
An Ultimate Guide to Using Ice Packs for Ankles
When you twist an ankle, reaching for an ice pack is almost second nature. That immediate, sharp cold feels like a lifeline, cutting through the throbbing pain of a fresh injury. It's more than just a comforting sensation; it’s a powerful first aid step that kicks off the healing process right away, without you needing to reach for a pill bottle.
How an Ice Pack Soothes a Sore Ankle
Ever wondered what’s actually happening when you slap a bag of frozen peas on a sprained ankle? The science behind it, known as cryotherapy, is surprisingly straightforward but incredibly effective. Think of it as traffic control for your body’s emergency response team.
After an injury, your body floods the area with blood and other fluids. This is a natural and necessary part of healing, but it's also what causes the tell-tale swelling and pressure that really hurts.
Applying cold to the sprain causes the blood vessels to clamp down and narrow. This process is called vasoconstriction, and it basically slows down the rush of fluid to the injury. It’s a bit like closing a few lanes on a motorway to prevent a massive traffic jam at the scene of an accident.
By reining in this initial flood, an ice pack achieves two critical things:
- It dials down the swelling. By limiting the fluid buildup, you directly tackle the inflammation that causes most of the pain and stiffness.
- It numbs the area. The intense cold dulls the nerve endings in your skin and tissue, which interrupts the pain signals being fired off to your brain.
A Cornerstone of Injury First Aid
This one-two punch of less swelling and less pain is exactly why cold therapy is a non-negotiable part of the most trusted first-aid protocol for acute injuries, known universally as RICE.
The RICE method stands for Rest, Ice, Compression, and Elevation. It’s the gold standard for treating soft tissue injuries like ankle sprains, helping manage pain and swelling in those crucial first couple of days.
Ankle sprains are ridiculously common. In fact, they account for around 230,000 visits to GPs in Australia every single year. For the first 48-72 hours, official treatment guidelines consistently recommend the RICE protocol, specifically advising the use of ice packs for ankles for 15-20 minutes every two hours. Just remember to always wrap the ice pack in a thin towel to protect your skin from ice burn.
The Bigger Picture: Understanding Cold's Power
The principles of using cold to fight inflammation go far beyond a simple sprain. If you’re curious to learn more about the science, our guide on what cold therapy is is a great place to start.
And it doesn't just stop at targeted ice packs. For a wider look at how deliberate cold exposure can boost recovery and overall wellness, you can explore methods like integrating cold plunge therapy. Once you understand how cold works, you can use it with confidence to manage your ankle injury and get back on your feet faster.
Choosing the Best Ice Pack for Your Ankle Injury
When your ankle is throbbing, just about any cold object feels like a lifesaver. But let’s be honest, not all ice packs are created equal, especially when you’re trying to wrap one around the awkward, bony curves of an ankle. Picking the right tool for the job can make a world of difference to your comfort and how quickly you get back on your feet.
The best choice really boils down to your lifestyle, the type of injury you're nursing, and what’s most convenient for you at the moment. Let's walk through the most common types so you can find the perfect match.
Reusable Gel Packs: The Flexible Favourite
There’s a good reason reusable gel packs are a fixture in most household first-aid kits. They're filled with a non-toxic gel that stays soft and bendy even when it's frozen solid, which means they can mould perfectly to your body.
This flexibility is their superpower. An ankle isn't a flat surface; it's a collection of curves, ligaments, and bony bits. A good gel pack can wrap snugly around the whole joint—from the bony knobs on either side to the Achilles tendon at the back—ensuring that the soothing cold gets to all the swollen and sore spots.
They're fantastic for ongoing recovery at home.
Instant Cold Packs: The On-the-Go Solution
For sheer convenience, nothing beats an instant cold pack. These don't need a freezer to work their magic. You just give the pack a firm squeeze or a good crack to break an inner pouch, setting off a chemical reaction that makes it icy cold in seconds.
These single-use wonders are perfect for stashing in your gym bag, the car’s glovebox, or a hiking pack. If you roll your ankle during a weekend footy match, you can activate one right there on the sideline. This means you can start the crucial icing process within minutes of the injury happening, which is a massive head start.
Why this matters: The biggest win with an instant pack is its portability. It lets you kick off the "Ice" part of the R.I.C.E. protocol immediately, wherever you are. Those first few moments can be critical for keeping swelling in check.
Specialised Ankle Wraps: The All-in-One Healer
If you’re after maximum efficiency, a specialised ankle wrap is the way to go. These clever designs combine a reusable gel pack with a fabric brace or strap system, tackling two jobs at once.
This setup delivers two key parts of the R.I.C.E. protocol simultaneously: ice and compression. The wrap holds the cold pack firmly in place while the adjustable straps apply gentle, consistent pressure to help control swelling. It's a hands-free solution that lets you ice your ankle properly while you’re sitting at a desk or resting on the couch, without having to awkwardly balance a slippery pack.
The chart below gives you a clear, simple guide for what to do right after you've hurt your ankle.
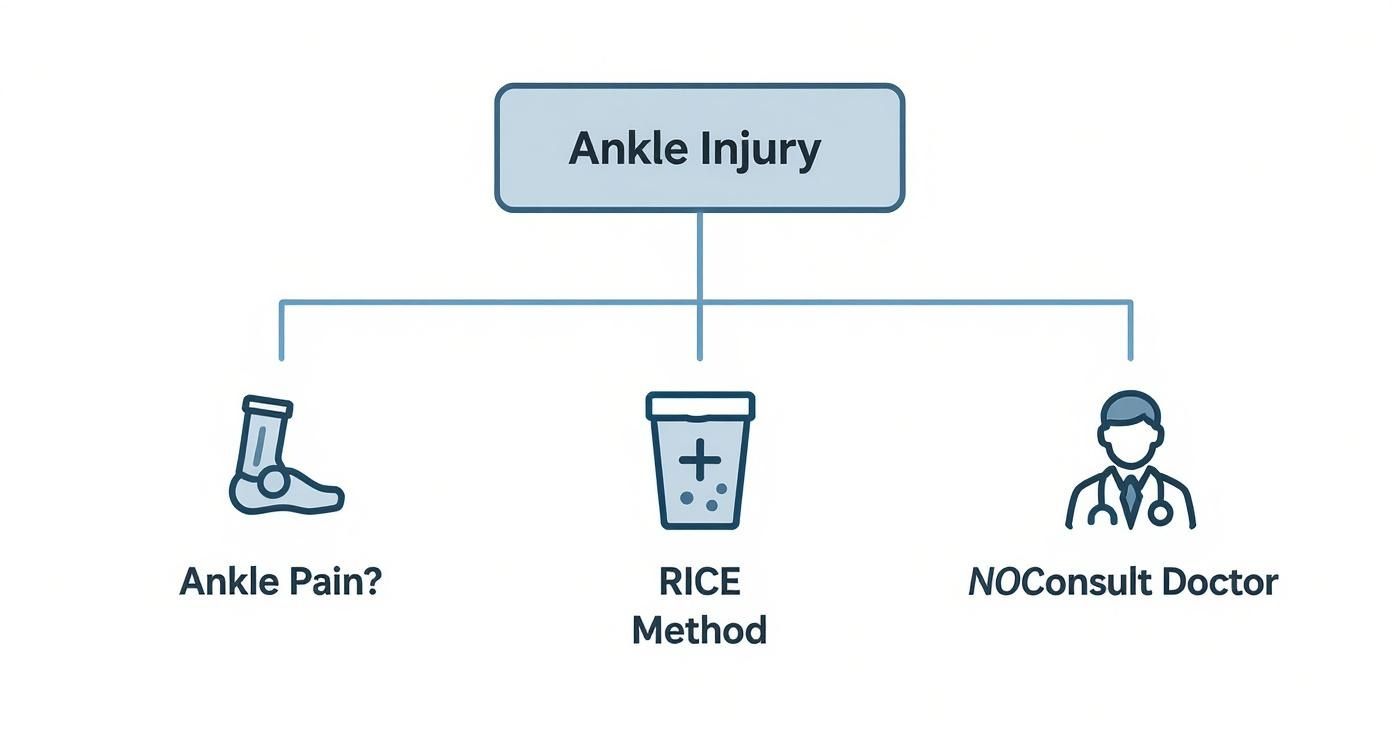
As you can see, the first steps are pretty straightforward, with any kind of ankle pain leading directly to the R.I.C.E. method for immediate care.
Comparison of Ankle Ice Pack Types
So, how do you choose? It really depends on what you need. Are you managing a recurring niggle at home, or are you preparing for a "just in case" injury while you're out and about? This side-by-side table should make the decision a lot clearer.
| Ice Pack Type | Key Features | Best For | Pros | Cons |
|---|---|---|---|---|
| Reusable Gel Pack | Flexible gel that contours to the ankle. | Home use for sprains, strains, and chronic pain. | Cost-effective, reusable, excellent coverage. | Needs a freezer, so it's not portable for immediate use. |
| Instant Cold Pack | Chemical reaction provides instant cold. | Sports bags, first-aid kits, immediate on-the-spot care. | Extremely portable, ready anytime, anywhere. | Single-use only; can get expensive with frequent use. |
| Ankle Wrap | Combines a gel pack with a compression strap. | Hands-free recovery at home or work. | Delivers both cold and compression, secure fit. | Bulkier than a simple pack, higher initial cost. |
At the end of the day, the best ice pack is the one you’ll actually use correctly and consistently. For recovery at home, a flexible gel pack or a dedicated ankle wrap is usually the better choice. But for athletes and active people, having an instant pack tucked away in your bag means you’re always ready to fight back the moment an injury strikes.
How to Use Ice Packs on Your Ankle: A Step-by-Step Guide
Applying an ice pack might seem straightforward, but there's a right way and a wrong way to do it. Getting the details right makes the difference between fast, effective relief and accidentally harming your skin or slowing down your recovery. This guide will walk you through the process, making sure you get the most out of your home cold therapy.
The first step is the most crucial: never put a frozen pack directly on your skin. It's a hard and fast rule. Direct contact can cause nasty injuries like frostbite or an ice burn, which is the last thing you want when you're already dealing with a sprain.
Always use a thin barrier. A dry tea towel, a light t-shirt, or even a couple of paper towels will work perfectly. This layer protects your skin but is thin enough to let the therapeutic cold reach the inflamed tissues underneath.
Positioning and Securing the Pack
Okay, so you’ve got your barrier. Now comes the slightly awkward part—getting the ice pack to stay put on the bony, curved shape of an ankle. You want the cold focused right on the most painful or swollen spots, which are usually around the sides or front of the joint.
A reusable gel pack is great here because you can mould it to fit. If you're using a classic bag of frozen peas, it'll naturally conform to your ankle's shape. But for a truly hands-free, secure fit, nothing beats an elastic bandage or compression wrap.
Here's how to get it right:
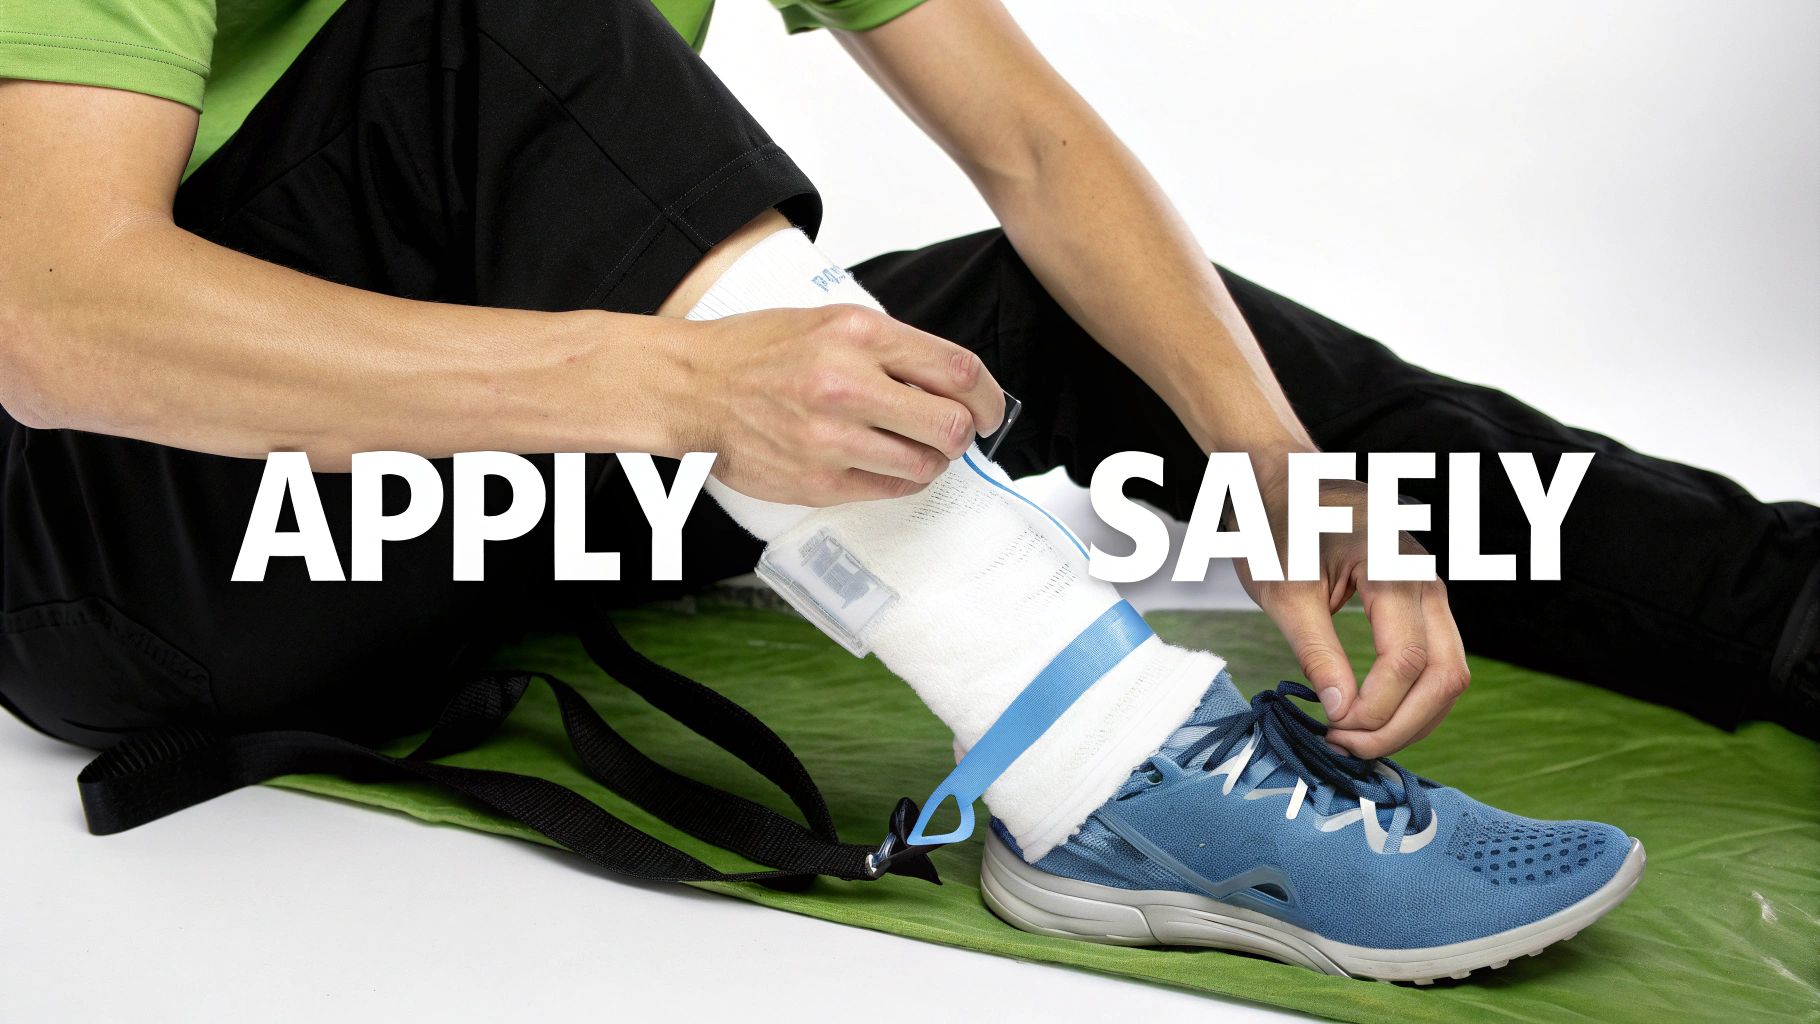
- Position the Pack: Place the ice pack right over the main area of swelling, holding it in place with one hand.
- Start Wrapping: With your other hand, begin wrapping the elastic bandage around your foot and ankle. It's often best to start a little further away from the injury and wrap towards it.
- Secure with Gentle Pressure: The wrap should be snug enough to hold the pack firmly against your skin, but not so tight that it feels like it's cutting off circulation. If you feel any tingling or numbness from the wrap itself, it's too tight.
This technique is a winner because it delivers both cold and compression—two of the key elements of the RICE method—at the same time, making your treatment much more effective.
Master the Timing for Optimal Results
When it comes to icing, timing is everything. Leaving an ice pack on for too long can backfire and cause more harm than good. The universally accepted guideline is the 15-20 minute rule.
That window is the sweet spot. It's long enough to constrict blood vessels and bring down swelling, but not so long that you risk damaging the tissue. If you go much past 20 minutes, your body can sometimes overcompensate by rushing blood back to the area—a reflex called reactive vasodilation—which can actually make the inflammation worse.
For safe and effective cold therapy, stick to a strict cycle: 20 minutes of icing, followed by at least two hours off. This gives your skin and underlying tissues plenty of time to return to a normal temperature before you ice again.
You can repeat this cycle several times a day, especially during the first 48 to 72 hours after an injury when swelling is at its worst. A simple timer on your phone is your best friend here; it’ll make sure you don't forget to take the pack off.
After the Icing Session
Once your 20 minutes are up, gently unwrap your ankle and remove the ice pack. It's completely normal for your skin to look a bit pink or red from the cold. Pop your reusable pack back in the freezer so it’s ready for the next round.
If you can, keep your ankle elevated for a while after icing. Propping your foot up on a few pillows helps gravity drain excess fluid away from the injury site, giving you an extra hand in the fight against swelling. By following these simple but vital steps, you can use cold therapy with confidence to manage your pain and get back on your feet faster.
When You Should Use Ice on an Ankle Injury
Knowing when to reach for an ice pack is just as crucial as knowing how to use one. Good timing can make a massive difference in how quickly you recover, so let’s get it right. The golden rule is pretty straightforward: use ice for new, acute injuries where swelling is the main problem.
Think of that sudden, painful ankle twist on the footy field or a clumsy misstep off a curb. These are acute injuries, and your body’s first response is to flood the area with fluid, which leads to inflammation. This is the exact moment when ice packs for ankles are your best friend.
The Critical First 72 Hours
For the first 48 to 72 hours after an injury like a sprain or strain, your body goes into full-blown emergency mode. This is what’s known as the acute inflammatory phase, and cold therapy is your number one ally during this window.
Applying ice helps to constrict the blood vessels. This simple action slows down that rush of fluid, which helps to get the swelling under control and numbs that sharp, immediate pain. Nailing this initial management sets you up for a much smoother healing process down the track.
In Australia, ankle sprains are a significant healthcare and economic issue. That’s why our clinical practice guidelines strongly recommend ice packs as a first-line treatment for managing that initial swelling and pain. The standard protocol from Aussie sports doctors and physios is to ice for 15 to 20 minutes every two hours for the first one to three days post-injury—perfectly lining up with this acute phase.
The Great Debate: Ice Versus Heat
One of the biggest points of confusion for treating injuries at home is whether to grab an ice pack or a heat pack. The answer really depends on the type of injury and how old it is. Unfortunately, getting it wrong can make things worse.
- Ice is for Inflammation: Reach for ice when you’re dealing with a fresh injury—think swelling, redness, and sharp pain. This is for your sprains, strains, and recent bumps. The goal is to reduce blood flow and calm down that inflammation.
- Heat is for Healing and Stiffness: Heat therapy is best kept for chronic conditions, muscle soreness, or stiffness where there’s no swelling. Heat actually increases blood flow, which is great for relaxing tight muscles and soothing achy joints well after the initial injury.
Putting heat on a brand-new sprain would be like opening the floodgates, encouraging even more swelling and inflammation. On the flip side, using ice on a stiff, sore muscle probably won’t give you that soothing relief you’re after. To get a better handle on how heat therapy works, you can check out our guide on the benefits of heat for pain relief.
When to Switch from Cold to Hot
So, when is it time to put the ice pack back in the freezer? Generally, after that initial 72-hour window, the worst of the swelling should have peaked and started to go down. At this point, you could start alternating between ice and heat, or switch over to heat completely to encourage blood flow and healing.
This transition helps to flush out waste products from the injury site and bring in fresh oxygen and nutrients to help the damaged tissues repair. For a more detailed look at when to use heat or cold for different kinds of pain, this guide on Heat Therapy vs Cold Therapy: Choosing the Right Pain Relief is an excellent resource. By understanding these basics, you can confidently pick the right therapy at the right time.
Easy and Effective DIY Ankle Ice Pack Alternatives
Ankle injuries almost never happen at a convenient time, and chances are you don't have a commercial-grade ice pack just waiting in your freezer. But the good news is you don't need fancy equipment to get effective cold therapy. Some of the very best ice packs for ankles can be whipped up in minutes using things you already have around the house.
When you need relief right now, your kitchen freezer can be a goldmine of makeshift solutions. These simple alternatives are surprisingly effective and can be a real lifesaver when you're in a pinch.
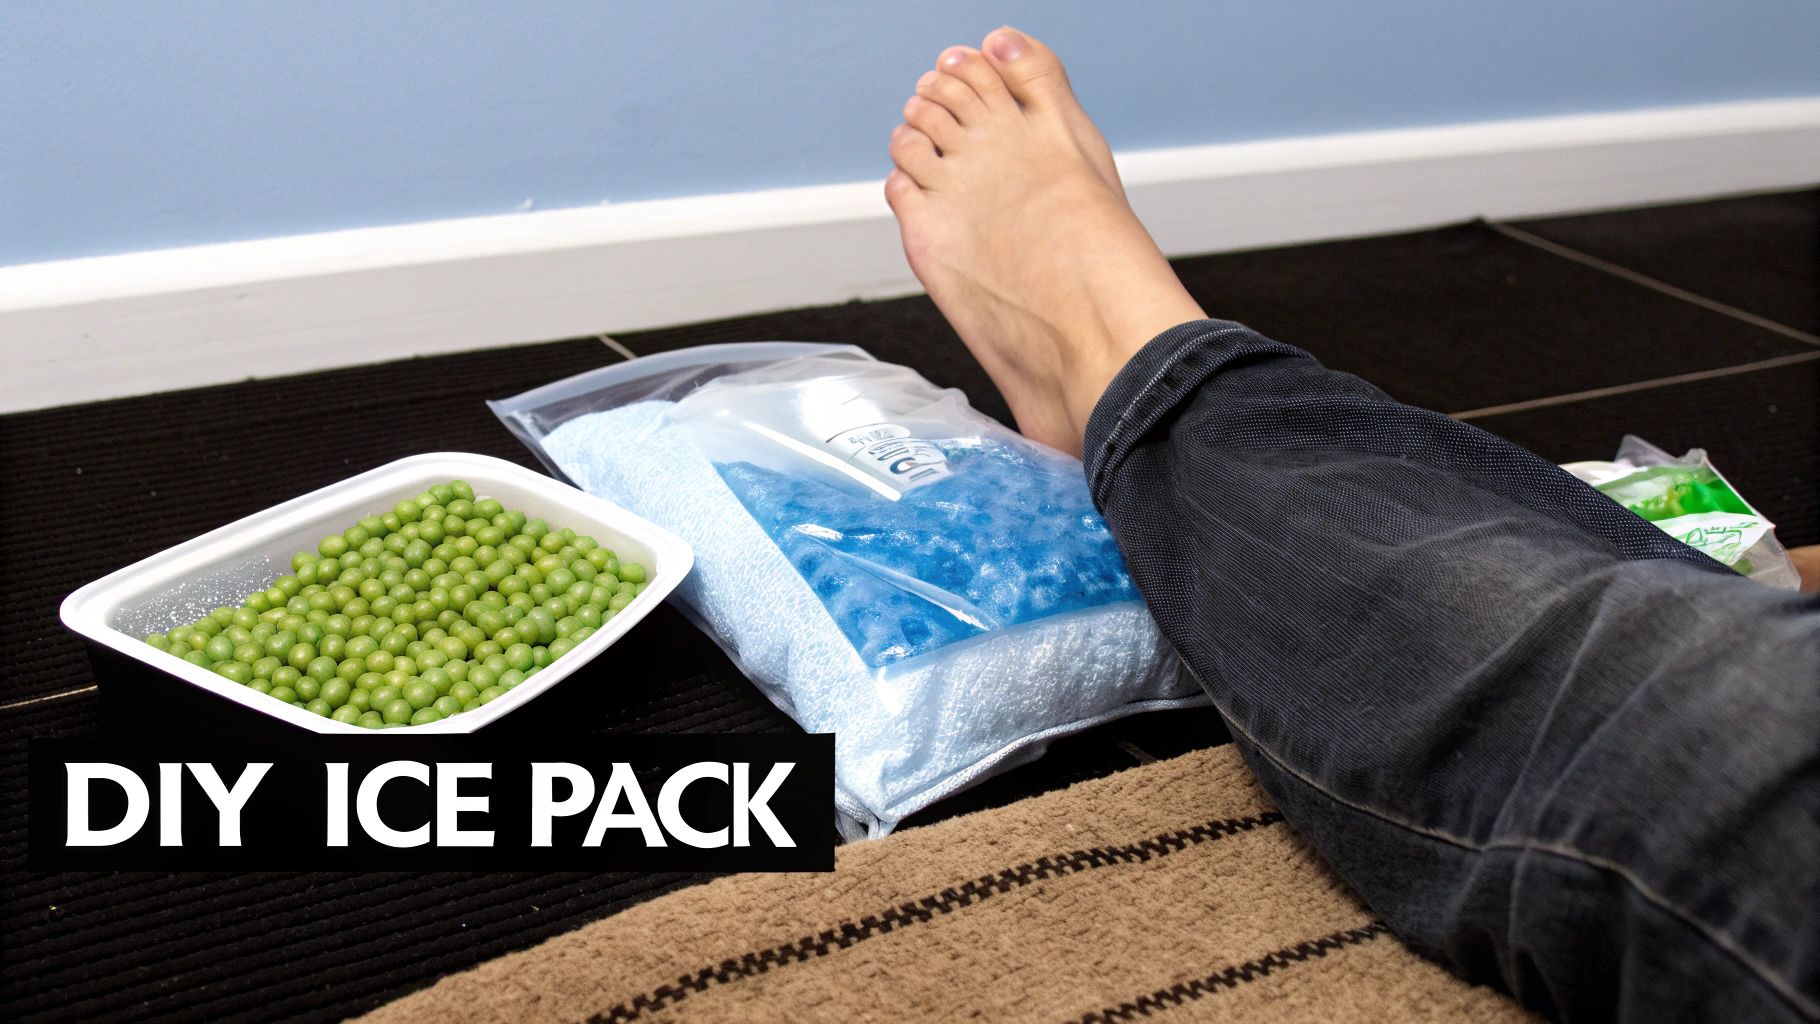
The Classic Bag of Frozen Vegetables
There's a very good reason a bag of frozen peas or corn is the classic, go-to DIY ice pack. Think about it: the small, individual veggies act like thousands of tiny ice cubes that can perfectly mould to the bony, complex shape of your ankle. This is key, as it ensures the cold actually reaches all those swollen nooks and crannies for consistent, widespread relief.
Here’s how to put it to work:
- Grab a bag of frozen peas, corn, or mixed vegetables straight from the freezer.
- Wrap it in a thin, dry tea towel or a t-shirt. This is a crucial step to protect your skin from ice burn.
- Drape it over your ankle, making sure it covers the most painful and swollen spots.
This simple tool is not only effective but also reusable. Just do yourself a favour and label it as "the ice pack bag" so it doesn't accidentally find its way into tonight's dinner. It’s a great example of using simple household items for first aid, a principle that also applies when you need a cold compress for headache relief.
Create Your Own Reusable Slushy Gel Pack
If you're after something a bit more durable that mimics the feel of a proper gel pack, you can easily make your own. The best part? This version won't freeze into a solid, unforgiving block of ice, making it much more comfortable to use.
The magic ingredient here is rubbing alcohol. It has a much lower freezing point than water, and when you mix the two, it stops the water from turning into hard ice. What you get instead is a soft, slushy consistency that’s perfect for wrapping around a joint.
Why this works: The alcohol-water mixture stays malleable even when frozen, letting it contour perfectly to your ankle. This creates much better surface contact and more efficient cooling than you’d get from a rigid block of ice.
Here’s how to make one yourself:
- Ingredients: You'll need a sturdy, resealable freezer bag (double-bagging is a smart move to prevent leaks), some water, and isopropyl (rubbing) alcohol.
- The Ratio: The secret is mixing two parts water to one part rubbing alcohol inside the bag. So, for every cup of water, add half a cup of alcohol.
- Seal and Freeze: Squeeze as much air out of the bag as you can before sealing it tightly. Lay it flat in the freezer for at least a few hours.
This DIY gel pack gives you a reusable, flexible, and surprisingly effective tool for managing ankle pain and swelling. It just goes to show that with a little creativity, you can create a top-tier first-aid tool right in your own kitchen.
Right, let's get down to what not to do when you're trying to ice an ankle. It seems simple enough—slap on a cold pack and you're good to go—but a few common slip-ups can easily make things worse. Think of this as your guide to avoiding the classic blunders that can slow down your recovery or even cause more harm.
Don't Put Ice Directly on Your Skin
This is the big one, and it's non-negotiable. Putting a frozen pack straight onto your skin is a fast track to an ice burn or even frostbite. Seriously, you don’t want to trade a sprain for skin damage.
Always, and I mean always, wrap the ice pack in a thin, dry barrier. A tea towel, a light t-shirt, or a paper towel will do the trick. It creates just enough of a buffer to protect your skin while still letting the cold work its magic.
Don't Ice for Too Long
More isn't always better, especially with cold therapy. It might feel soothing, but leaving an ice pack on for longer than the recommended 15 to 20 minutes is a bad idea. Go past that window, and you risk damaging your skin, nerves, and the underlying tissues.
Your body might even fight back with something called reactive vasodilation. This is where it tries to "save" the area from the extreme cold by flooding it with warm blood, which can ironically crank up the swelling and inflammation you were trying to calm down.
Don't Forget the "Off" Time or Ice Before Activity
The break between icing sessions is just as crucial as the icing itself. You need to give your ankle a rest for at least two hours before icing again. This lets your skin and tissues get back to a normal temperature and prevents any cumulative cold damage.
And please, never ice your ankle right before you play a sport or do any physical activity. It might numb the pain, which sounds good, but that's the problem. Pain is your body's alarm system. Muting it means you can't tell when you're pushing the injury too far, making a much worse injury all too likely.
A huge mistake is falling asleep with an ice pack on. It's so easy to do, but you'll blow way past the safe 20-minute limit and put yourself at serious risk of a cold injury. Always set a timer on your phone—it's your best friend here.
Keeping Cold Therapy in Perspective
While icing is a go-to for immediate injury care, it's good to know what it can and can't do. The clinical evidence on its long-term effectiveness is still being debated. A systematic review of trials, some even conducted in Australia, noted there wasn't enough hard proof to say ice definitively speeds up healing.
However, the consensus is that using ice packs for ankles is incredibly effective for managing pain in those first critical 48-72 hours. It provides comfort and symptomatic relief when you need it most. If you're keen to dig deeper, you can explore the research on icing effectiveness.
Got Questions About Icing Your Ankle? Let's Clear Things Up.
Even when you've got the basics down, a few specific questions always seem to come up when you're dealing with an ankle injury. Getting straight answers helps you take control of your recovery and use cold therapy the right way. Let's dive into some of the most common ones I hear.
How Long Should I Keep Ice on a Sprained Ankle?
When you've just sprained your ankle, the golden rule is 15 to 20 minutes on, then take a break. That’s the sweet spot for the cold to get deep enough to reduce inflammation without causing any harm to your skin, like an ice burn.
After each 20-minute session, give your ankle at least a two-hour rest before you ice it again. Stick to this routine for the first 48 to 72 hours after the injury—that’s when the swelling and pain are at their worst and icing will do the most good.
Can I Ice My Ankle for Arthritis Pain?
Absolutely. Cold therapy can be a real lifesaver for ankle arthritis, particularly when you're having a flare-up. If your joint feels hot, looks swollen, and is throbbing after you've been on your feet, an ice pack can help calm everything down and bring some welcome relief.
That said, for the nagging, chronic stiffness that arthritis often brings (when there isn't any new swelling), you might find a heat pack feels much better. Your best bet is always to chat with your doctor to work out a management plan that's right for your specific condition.
Is It Normal for My Ankle to Go Numb When I Ice It?
Yes, that's completely normal and actually what you're aiming for. When you first put the ice on, you'll go through a few sensations. It usually starts with an intense cold, followed by a bit of a burning or aching feeling, and then, finally, numbness.
Reaching that numb stage is a good sign. It means the cold is doing its job, dulling the nerve endings and blocking those pain signals from reaching your brain. Once you feel that numbness setting in, you know you’re getting close to the end of your 20-minute icing session.
For a Sprained Ankle, Is Ice or Heat Better?
For a fresh sprain, it's ice, no contest. In those first 72 hours, the injury is all about inflammation and swelling. Ice constricts the blood vessels, which directly tackles the swelling and helps numb the sharp pain.
Applying heat does the exact opposite—it opens up the blood vessels and boosts blood flow. Putting heat on a new injury would be like pouring petrol on a fire; you'd just make the swelling and pain a whole lot worse. Save the heat for later in the healing process, once the initial inflammation is gone, to help with muscle stiffness.
For drug-free relief that adapts to your needs, consider the versatile hot and cold therapy solutions from Headache Cap. While designed for headaches, the same principles of high-quality cold therapy can be applied to other areas of discomfort. Explore the range at https://headachecap.com.au.


